ASP.NET Core and Angular2 using dotnet CLI and Visual Studio Code
Jürgen Gutsch - 19 September, 2016
This is another post about ASP.NET Core and Angular2. This time I use a cleaner and more light weight way to host a Angular2 App inside an ASP.NET Core Web. I'm going to use dotnet CLI and Visual Studio Code.
A few days ago there was an update for ASP.NET Core announced. This is not a big one, but a important run-time update. You should install it, if you already use ASP.NET Core 1.0. If you install it the first time (loaded from http://get.asp.net/), the update is already included. Also since a few days, the final version of Angular2 was announced. So, we will use Angular 2.0.0 and ASP.NET Core 1.0.1.
This post is structured into nine steps:
#1 Create the ASP.NET Core web
The first step is to create the ASP.NET Core web application this is the easiest thing using the dotnet CLI. After downloading it from http://get.asp.net and installing it, you are directly able to use it. Choose any console you like and g to your working folder.
Type the following line to create a new web application inside that working folder:
> dotnet new -t web
If you used the dotnet CLI for the first time it will take a few seconds. After the first time it is pretty fast.
Now you have a complete ASP.NET Core quick-start application. Almost the same thing you get, if you create a new application in Visual Studio 2015.
Now we need to restore the NuGet packages, which contains all the .NET Core and ASP.NET dependencies
> dotnet restore
This takes a few seconds, depending in the amount of packages or on the internet connection.
If this is done, type dotnet run to start the app. You will see an URL in the console. Copy this URL and paste it into the browsers address bar. As you can see, you just need three console commands to create a working ASP.NET application.
#2 Setup the ASP.NET Core web
To support a Angular2 single page application we need to prepare the Startup.cs a little bit. Because we don't want to use MVC, but just the web API, we need to remove the configured default route.
To support Angular routing, we need to handle 404 errors: In case a requested resource was not found on the server, it could be a Angular route. This means we should redirect request, which results in a error 404, to the index.html. We need to create this file in the wwwroot folder later on.
The Configure method in the Startup.cs now looks like this:
public void Configure(IApplicationBuilder app, IHostingEnvironment env, ILoggerFactory loggerFactory)
{
    loggerFactory.AddConsole(Configuration.GetSection("Logging"));
    loggerFactory.AddDebug();

    if (env.IsDevelopment())
    {
        app.UseDeveloperExceptionPage();
        app.UseDatabaseErrorPage();
        app.UseBrowserLink();
    }
    else
    {
        app.UseExceptionHandler("/Home/Error");
    }

    app.Use(async (context, next) =>
    {
        await next();

        if (context.Response.StatusCode == 404
            && !Path.HasExtension(context.Request.Path.Value))
        {
            context.Request.Path = "/index.html";
            await next();
        }
    });

    app.UseStaticFiles();

    app.UseIdentity();

    app.UseMvc();
}
#3 The front-end dependencies
To develop the front-end with Angular 2, we need some tools, like TypeScript, Webpack and NPM. We use TypeScript to write the client code, which will be transpiled to JavaScript using Webpack. We use Webpack with a simple Webpack configuration to transpile the TypeScript code to JavaScript and to copy the dependencies to the wwwroot folder.
NPM is used to get all that stuff, including Angular itself, to the development machine. We need to configure the package.json a little bit. The easiest way is to use the same configuration as in the ANgular2 quick-start tutorial on angular.io
You need to have Node.JS installed on your machine, To get all the tools working.
{
  "name": "webapplication",
  "version": "0.0.0",
  "private": true,
  "scripts": {
    "start": "tsc && concurrently \"npm run tsc:w\" \"npm run lite\" ",
    "lite": "lite-server",
    "postinstall": "typings install",
    "tsc": "tsc",
    "tsc:w": "tsc -w",
    "typings": "typings"
  },
  "dependencies": {
    "@angular/common": "2.0.0",
    "@angular/compiler": "2.0.0",
    "@angular/core": "2.0.0",
    "@angular/forms": "2.0.0",
    "@angular/http": "2.0.0",
    "@angular/platform-browser": "2.0.0",
    "@angular/platform-browser-dynamic": "2.0.0",
    "@angular/router": "3.0.0",
    "@angular/upgrade": "2.0.0",

    "core-js": "2.4.1",
    "reflect-metadata": "0.1.3",
    "rxjs": "5.0.0-beta.12",
    "systemjs": "0.19.27",
    "zone.js": "0.6.21",

    "bootstrap": "3.3.6"
  },
  "devDependencies": {
    "ts-loader": "0.8.2",
    "ts-node": "0.5.5",
    "typescript": "1.8.10",
    "typings": "1.3.2",
    "webpack": "1.13.2"
  }
}
You should also install Webpack, Typings and TypeScript globaly on your machine:
> npm install -g typescript
> npm install -g typings
> npm install -g webpack
The TypeScript build needs a configuration, to know how to build that code. This is why we need a tsconfig.json:
{
  "compilerOptions": {
    "target": "es5",
    "module": "commonjs",
    "moduleResolution": "node",
    "sourceMap": true,
    "emitDecoratorMetadata": true,
    "experimentalDecorators": true,
    "removeComments": false,
    "noImplicitAny": false
  }
}
And TypeScript needs type defintions for all the used libraries, which are not written in TypeScript. This is where Typings is used. Typings is a kind of a package manager for TypeScript type definitions, which also needs a configuration:
{
  "globalDependencies": {
    "core-js": "registry:dt/core-js#0.0.0+20160725163759",
    "jasmine": "registry:dt/jasmine#2.2.0+20160621224255",
    "node": "registry:dt/node#6.0.0+20160909174046"
  }
}
Now we can use npm install in the console to load all that stuff. This command automatically calls typings install as a NPM post install event.
#4 Setup the single page
The Angular2 app is hosted on a single HTML page inside the wwwroot folder of the ASP.NET Core web. Add a new index.html and add it to the wwwroot folder:
<html>
    <head>
        <title>Angular 2 QuickStart</title>
        <meta charset="UTF-8">
        <meta name="viewport" content="width=device-width, initial-scale=1">
        <link rel="stylesheet" href="css/site.css">
        <!-- 1. Load libraries -->
        <script src="js/core.js"></script>
        <script src="js/zone.js"></script>
        <script src="js/reflect.js"></script>
        <script src="js/system.js"></script>
        <!-- 2. Configure SystemJS -->
        <script src="systemjs.config.js"></script>
        <script>
          System.import('app').catch(function(err){ console.error(err); });
        </script>
    </head>
    <!-- 3. Display the application -->
    <body>
        <my-app>Loading...</my-app>
    </body>
</html>
Currently we don't have the JavaSript dependencies configured. This is what we will do in the next step
#5 configure webpack
Webpack has two tasks in this simple tutorial. The first thing is to copy some dependencies out of the node_modules folder into the wwwroot folder, because static files will only be provided out of this special folder. We need Core.JS, Zone.JS, Reflect-Metadata and System.JS. The second task is to build and bundle the Angular2 application (which is not yet written) and all it's dependencies.
Let's see how this simple Webpack configuration (webpack.config.js) looks like:
module.exports = [
  {
    entry: {
      core: './node_modules/core-js/client/shim.min.js',
      zone: './node_modules/zone.js/dist/zone.js',
      reflect: './node_modules/reflect-metadata/Reflect.js',
      system: './node_modules/systemjs/dist/system.src.js'
    },
    output: {
      filename: './wwwroot/js/[name].js'
    },
    target: 'web',
    node: {
      fs: "empty"
    }
  },
  {
    entry: {
      app: './wwwroot/app/main.ts'
    },
    output: {
      filename: './wwwroot/app/bundle.js'
    },
    devtool: 'source-map',
    resolve: {
      extensions: ['', '.webpack.js', '.web.js', '.ts', '.js']
    },
    module: {
      loaders: [
        { test: /\.ts$/, loader: 'ts-loader' }
      ]
    }
  }];
We have two separate configurations for the mentioned tasks. This is not the best way how to configure Webpack. E.g. the Angular2 Webpack Starter or the latest Angular CLI, do the whole stuff with a more complex Webpack configuration.
To run this configuration, just type webpack in the console. The first configuration writes out a few warnings, but will work anyway. The second config should fail, because we don't have the Angular2 app yet.
#6 Configure the App
We now need to load the Angular2 app and it's dependencies. This is done with System.JS which also needs a ocnfiguration. We need a systemjs.config.js:
/**
 * System configuration for Angular 2 samples
 * Adjust as necessary for your application needs.
 */
(function (global) {
    System.config({
        paths: {
            // paths serve as alias
            'npm:': '../node_modules/'
        },
        // map tells the System loader where to look for things
        map: {
            // our app is within the app folder
            app: 'app',
            // angular bundles
            '@angular/core': 'npm:@angular/core/bundles/core.umd.js',
            '@angular/common': 'npm:@angular/common/bundles/common.umd.js',
            '@angular/compiler': 'npm:@angular/compiler/bundles/compiler.umd.js',
            '@angular/platform-browser': 'npm:@angular/platform-browser/bundles/platform-browser.umd.js',
            '@angular/platform-browser-dynamic': 'npm:@angular/platform-browser-dynamic/bundles/platform-browser-dynamic.umd.js',
            '@angular/http': 'npm:@angular/http/bundles/http.umd.js',
            '@angular/router': 'npm:@angular/router/bundles/router.umd.js',
            '@angular/forms': 'npm:@angular/forms/bundles/forms.umd.js',
            // other libraries
            'rxjs': 'npm:rxjs',
        },
        meta: {
            './app/bundle.js': {
                format: 'global'
            }
        },
        // packages tells the System loader how to load when no filename and/or no extension
        packages: {
            app: {
                main: './bundle.js',
                defaultExtension: 'js'
            },
            rxjs: {
                defaultExtension: 'js'
            }
        }
    });
})(this);
This file is almost equal to the file from the angular.io quick-start tutorial. We just need to change a few things:
The first thing is the path to the node_modules which is not on the same level as usual. So we need to change the path to ../node_modules/, we also need to tell System.js that the bundle is not a commonjs module. this is doen with the meta property. I also changed the app main path to ./bundle.js, instead of main.js
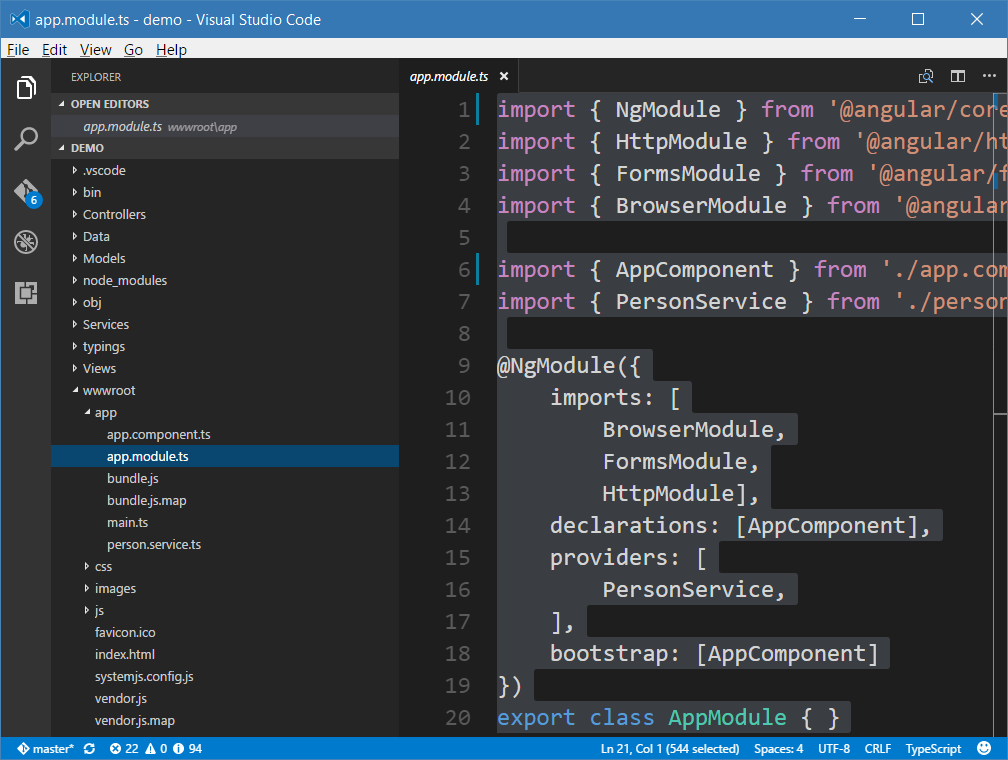
#7 Create the app
Inside the wwwroot folder, create a new folder called app. Inside this new folder we need to create a first TypeScript file called main.ts:
import { platformBrowserDynamic } from '@angular/platform-browser-dynamic';
import { AppModule } from './app.module';

const platform = platformBrowserDynamic();
platform.bootstrapModule(AppModule);
This script calls the app.module.ts, which is the entry point to the app:
import { NgModule } from '@angular/core';
import { HttpModule } from '@angular/http';
import { FormsModule } from '@angular/forms';
import { BrowserModule } from '@angular/platform-browser';

import { AppComponent } from './app.component';
import { PersonService } from './person.service';

@NgModule({
    imports: [
        BrowserModule,
        FormsModule,
        HttpModule],
    declarations: [AppComponent],
    providers: [
        PersonService,
    ],
    bootstrap: [AppComponent]
})
export class AppModule { }
The module collects all the parts of our app and puts all the components and services together.
This is a small component with a small inline template:
import { Component, OnInit } from '@angular/core';
import { PersonService, Person } from './person.service';

@Component({
    selector: 'my-app',
    template: `
    <h1>My First Angular 2 App</h1>
    <ul>
    <li *ngFor="let person of persons">
    <strong></strong><br>
    from: <br>
    date of birth:
    </li>
    </ul>
    `,
    providers: [
        PersonService
    ]
})
export class AppComponent extends OnInit {

    constructor(private _service: PersonService) {
        super();
    }

    ngOnInit() {
        this._service.loadData().then(data => {
            this.persons = data;
        })
    }

    persons: Person[] = [];
}
At least, we need to create a service which calls a ASP.NET Core web api. We need to create the API later on.
import { Injectable } from '@angular/core';
import { Http, Response } from '@angular/http';
import { Observable } from 'rxjs/Rx';
import 'rxjs/add/operator/toPromise';

@Injectable()
export class PersonService {
    constructor(private _http: Http) { }

    loadData(): Promise<Person[]> {
        return this._http.get('/api/persons')
            .toPromise()
            .then(response => this.extractArray(response))
            .catch(this.handleErrorPromise);
    }

    protected extractArray(res: Response, showprogress: boolean = true) {
        let data = res.json();
        return data || [];
    }

    protected handleErrorPromise(error: any): Promise<void> {
        try {
            error = JSON.parse(error._body);
        } catch (e) {
        }

        let errMsg = error.errorMessage
            ? error.errorMessage
            : error.message
                ? error.message
                : error._body
                    ? error._body
                    : error.status
                        ? `${error.status} - ${error.statusText}`
                        : 'unknown server error';

        console.error(errMsg);
        return Promise.reject(errMsg);
    }
}
export interface Person {
    name: string;
    city: string;
    dob: Date;
}
#8 The web API
The web api is pretty simple in this demo, just to show how it works:
using System;
using System.Collections.Generic;
using Microsoft.AspNetCore.Mvc;

namespace demo
{
    [Route("api/persons")]
    [ResponseCache(Location = ResponseCacheLocation.None, NoStore = true, Duration = -1)]
    public class PersonsController : Controller
    {
        [HttpGet]
        public IEnumerable<Person> GetPersons()
        {
            return new List<Person>
            {
                new Person{Name = "Max Musterman", City="Naustadt", Dob=new DateTime(1978, 07, 29)},
                new Person{Name = "Maria Musterfrau", City="London", Dob=new DateTime(1979, 08, 30)},
                new Person{Name = "John Doe", City="Los Angeles", Dob=new DateTime(1980, 09, 01)}
            };
        }
    }

    public class Person
    {
        public string Name { get; set; }
        public string City { get; set; }
        public DateTime Dob { get; set; }
    }

}
If you start the app using dotnet run you can call the API using that URL: http://localhost:5000/api/persons/, you'll see the three persons in the browser as a JSON result.
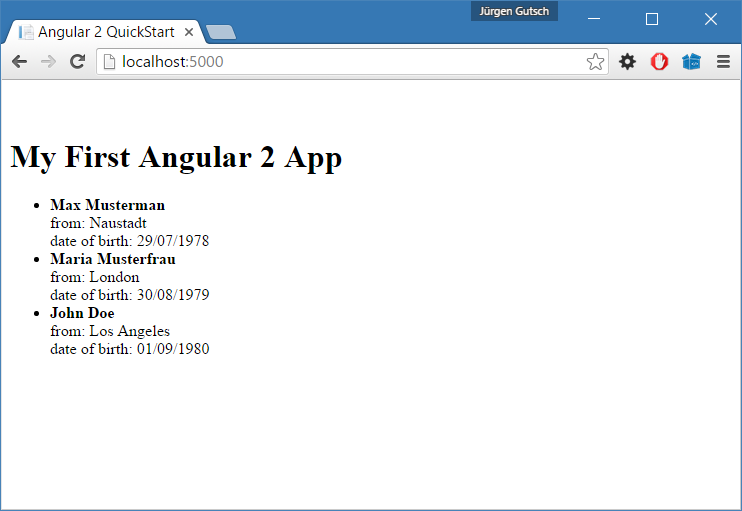
#9 That's it. Run the app.
Type webpack and dotnet run in the console to compile and pack the client app and to start the application. After that call the URL http://localhost:5000/ in a browser:
Conclusion
As you can see, hosting an Angular2 app inside ASP.NET Core web using this way is pretty much easier and much more light weight than using Visual Studio 2015.
Aniway, this is the last post about combining this two technologies. Because this is just a good way, if you write a small application. For bigger applications you should separate the client application from the server part. The Angular2 app should be written using Anngular CLI. Working like this both parts are completely independent and it is much easier to setup and to deploy.
I pushed the demo code to GitHub. Try it out, play around with it and give mes some feedback about it :)